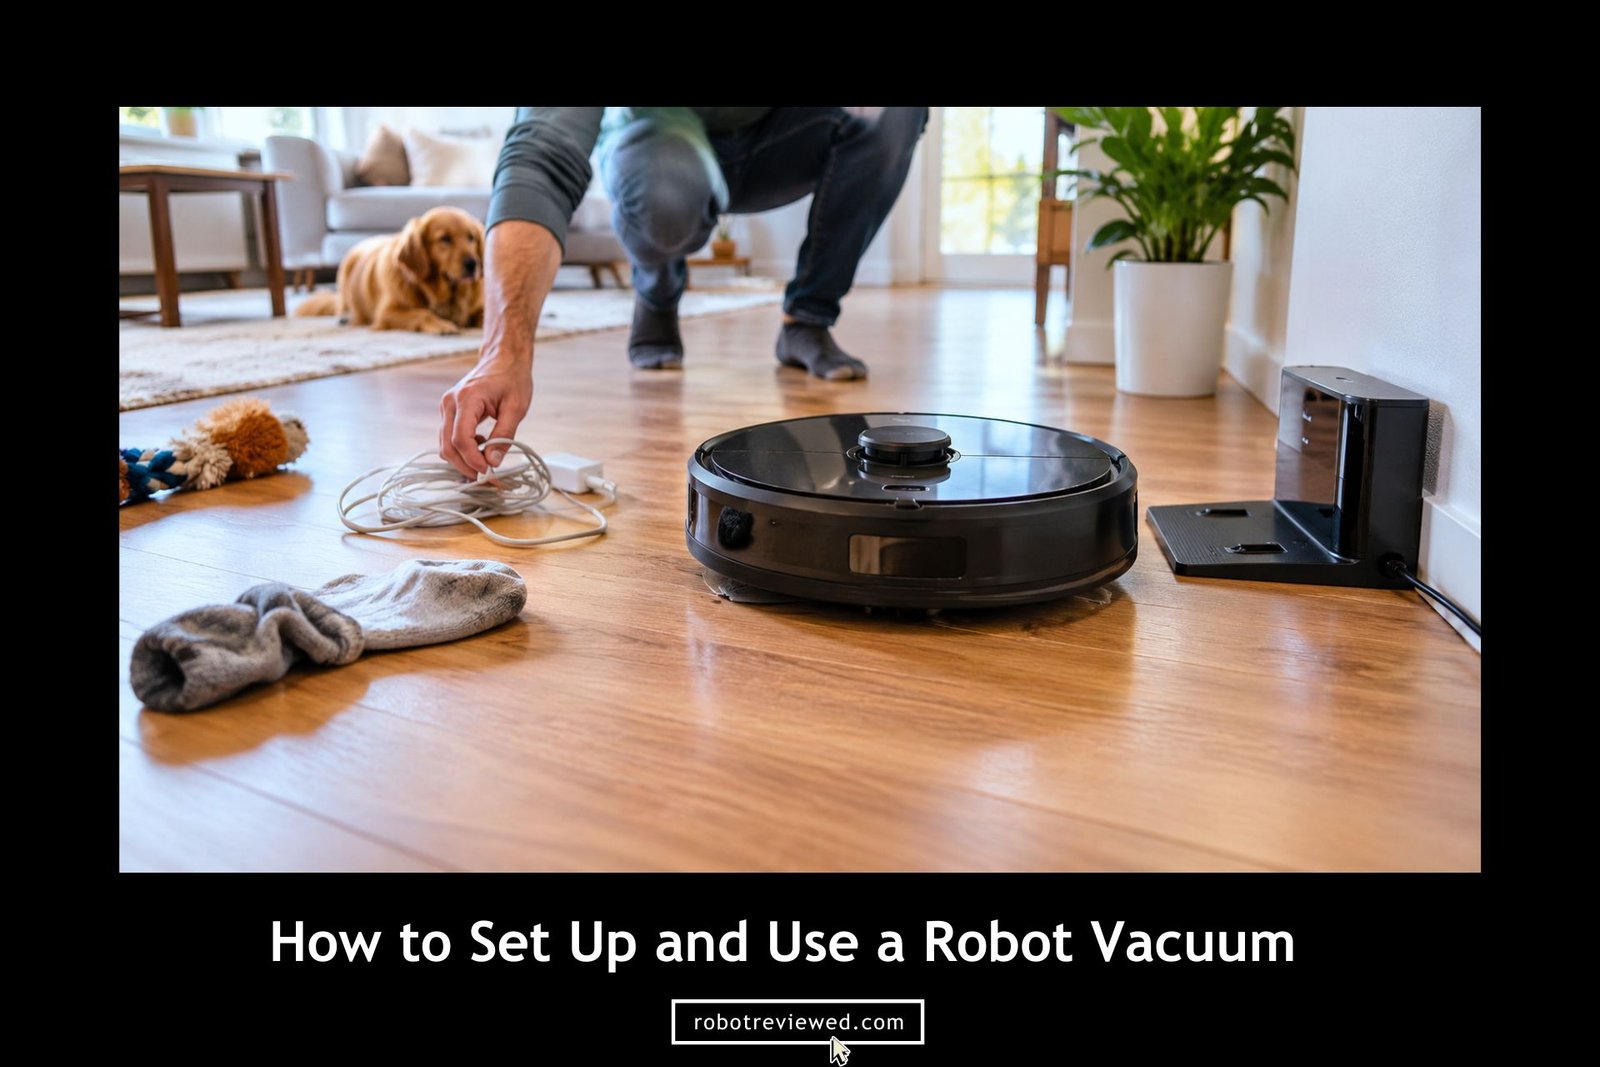
A new robot vacuum cleaner can look a little confusing when you first open the box. You have the robot, a dock, a power cable, maybe a few brushes, and an app you have not used before.
The good part is that a robotic vacuum setup is fairly simple once you do things in the right order.
You normally need to start by assembling any loose parts and finding a good place for the charging dock. After that, charge the robot, connect it to the app and Wi-Fi, clear your floors, and let it map your home. Also, don’t rush through the first map. A clean, accurate map makes room cleaning, schedules, no-go zones, and mopping much easier later.
Obviously, exact settings are different from one robot vacuum to another, so keep your manual nearby. The steps below cover the setup process used by most modern robot vacuums.
TABLE OF CONTENTS Quickly jump to a section
- Checklist: Before You Set Up Your Robot Vacuum
- How to Set Up a Robot Vacuum Cleaner Step by Step
- How to Map Your Home With a Robot Vacuum
- Set Up No-Go Zones, No-Mop Zones, and Cleaning Zones
- How to Use a Robot Vacuum for Everyday Cleaning
- How to Set a Robotic Vacuum Cleaning Schedule
- How to Use the Mopping Feature Correctly
- 7 Robot Vacuum Setup Mistakes to Avoid
- Robot Vacuum Not Working After Setup? Quick Fixes
- FAQs
Checklist: Before You Set Up Your Robot Vacuum
Now, get a few things ready before turning the robot on. Five minutes of preparation can save you from stopping halfway through setup because you cannot find a password, brush, or cable.
Your robot vacuum setup checklist should include:
- Robot vacuum and charging dock: Check that both are included and free from shipping damage.
- Power cable: Make sure it reaches the outlet you plan to use.
- Smartphone: You will usually need the manufacturer’s app for mapping and advanced controls.
- Wi-Fi details: Keep your network name and password handy.
- Side brushes and mop pads: Some models pack these separately.
- Open access to your rooms: The robot needs a clear route through the areas you want it to map.
Also, take a look at the quick-start guide too. You do not need to read the whole manual before getting started, but your model may have one or two setup steps that are different.
Read Recommendations: Best robotic vacuum cleaners reviewed
Clear the Floor Before the First Run
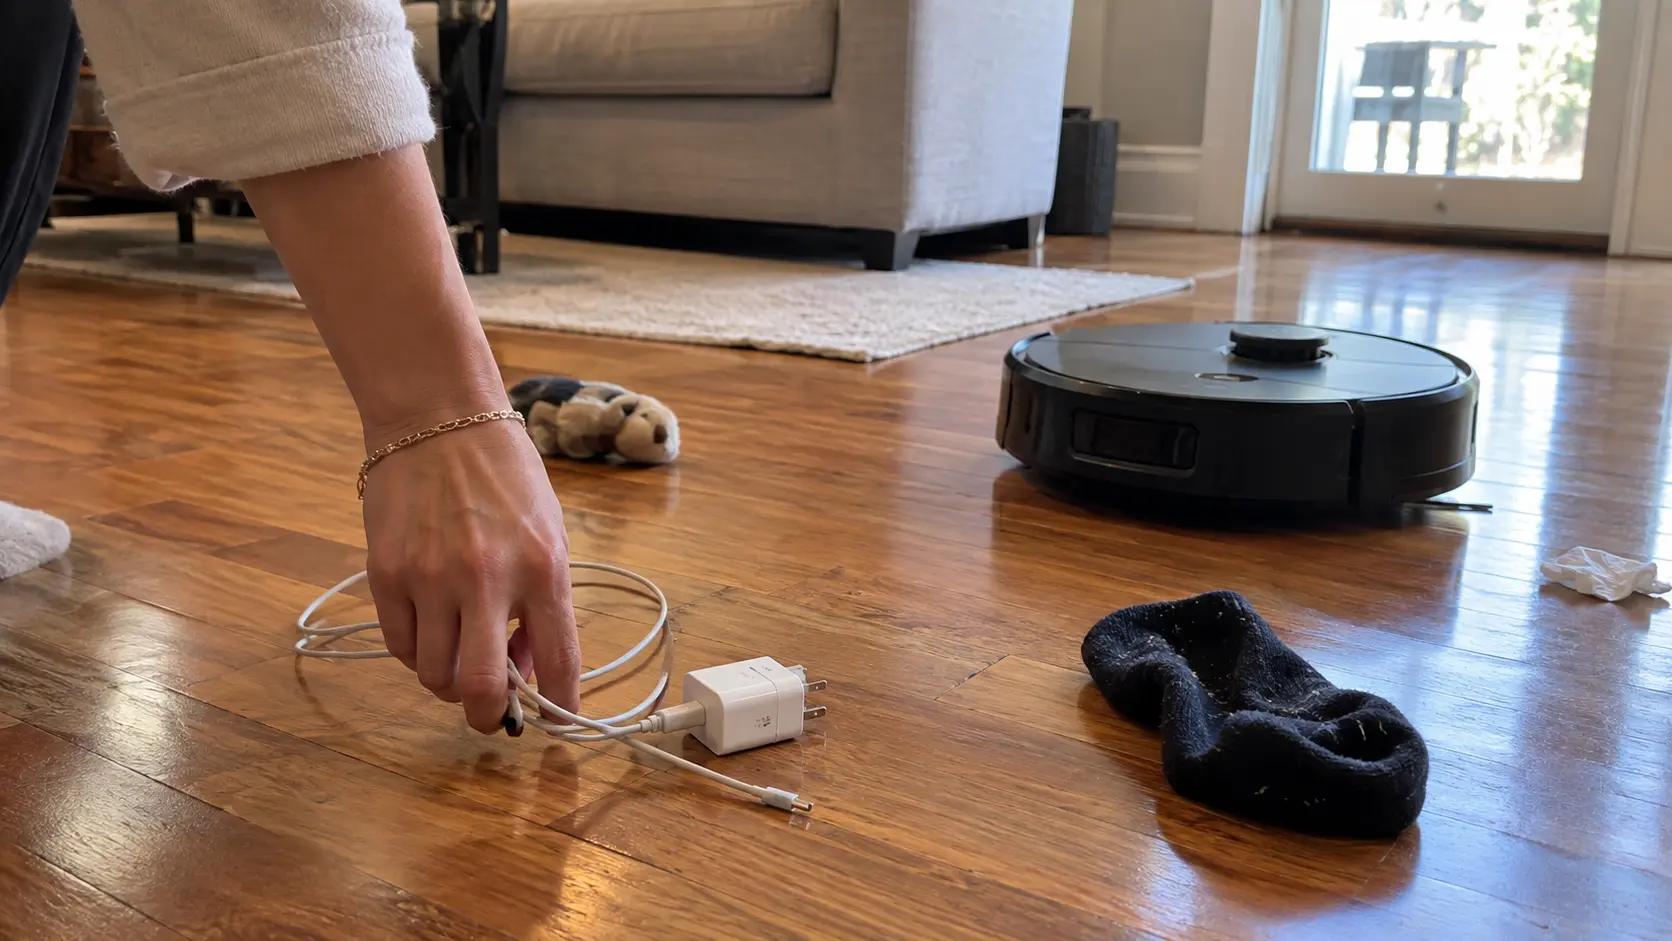
Robot vacuums are better at avoiding obstacles than they used to be, but you should not make the first run a test of their limits. So, I would suggest, pick up obvious troublemakers first:
- Phone chargers and loose power cables
- Socks and small pieces of clothing
- Small children’s toys
- String, ribbon, and shoelaces
- Long rug tassels
- Lightweight objects the robot could push around
- Pet waste
Okay, pet waste deserves special attention. Even a good obstacle-detection system is not something you want to gamble on here.
You also need to open the doors to every room you want included on the map as well. A closed bedroom door during the first mapping run can leave that room missing from the floor plan. Leave your normal furniture where it is. There is little benefit in creating a perfect empty-room map if your chairs, tables, and other furniture will be back in their usual places the next day.
How to Set Up a Robot Vacuum Cleaner Step by Step
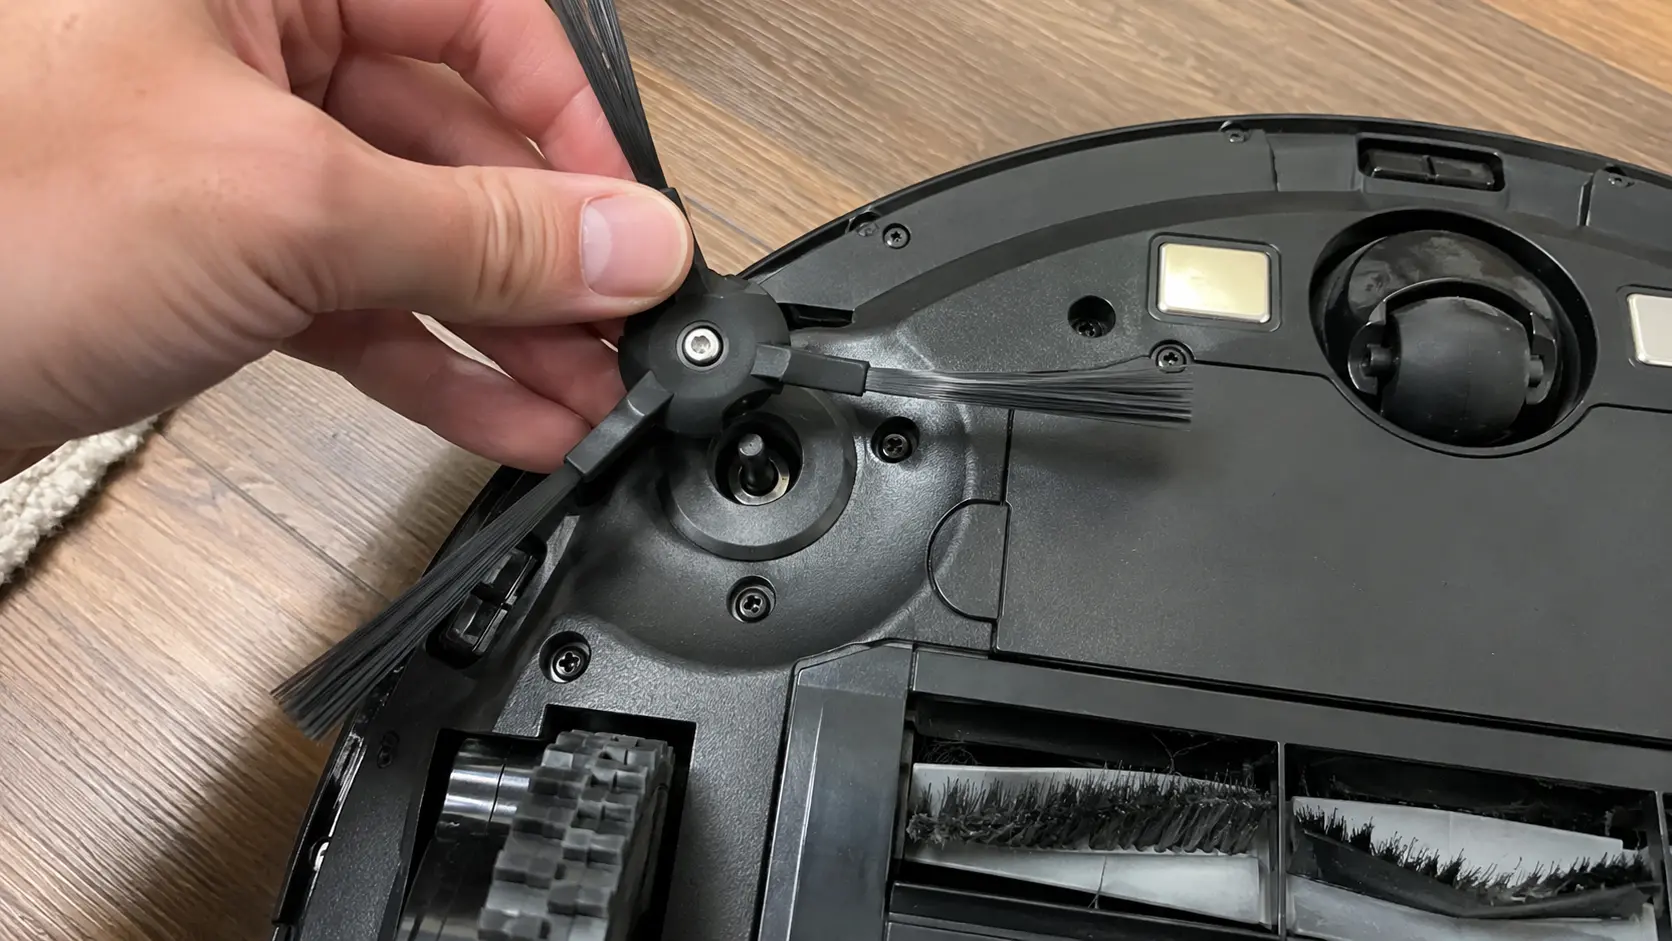
Step 1: Install Any Loose Parts
You can start with the pieces packed separately inside the box. You see, many robot vacuums arrive mostly assembled, but you may still need to fit one or more parts:
- Side brush: Usually snaps or screws onto the bottom of the robot.
- Main brush: Often comes installed, though some models pack it separately.
- Dustbin: Push it fully into place before running the vacuum.
- Filter: Check that it sits correctly inside the dustbin.
- Mop pad or mopping plate: Only needed on vacuum-and-mop combo models.
- Water tank: Some models use a removable tank, while self-cleaning robot vacuums may keep water tanks inside the dock.
Next, look underneath the vacuum before switching it on. Manufacturers sometimes place foam, plastic strips, stickers, or battery tabs around the robot for shipping. So, remove anything marked for removal, especially pieces covering sensors, wheels, brushes, or charging contacts.
I would say: leave the mop attachment off for the first vacuuming or mapping run unless your manual says otherwise. There is no reason to make the first setup more complicated than necessary.
Step 2: Choose the Right Location for the Charging Dock
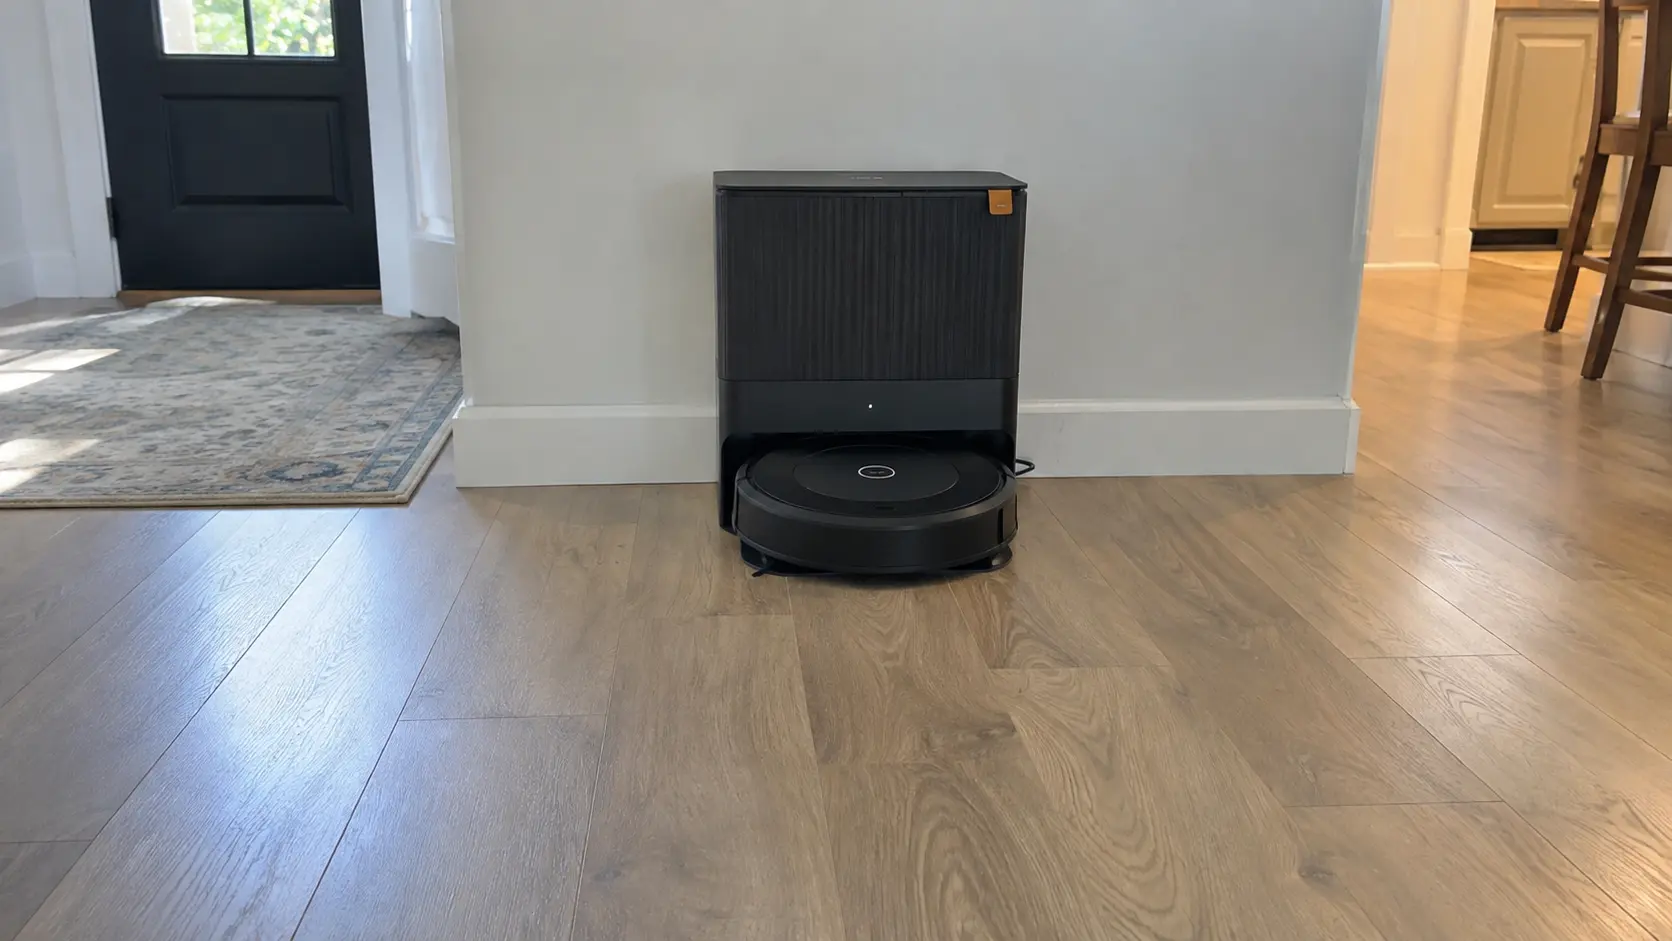
Your charging dock is more important than it looks. The robot has to find it after cleaning, line itself up correctly, and make solid contact with the charging points. Robots with advanced mapping may also use the dock as a fixed reference point.
So, put the dock:
- Against a flat wall
- On a level, stable floor
- Somewhere with open space around it
- Within good Wi-Fi coverage
- Away from loose cables
- Away from places where people constantly kick or move it
A hard floor is usually easier than a thick rug because the dock is less likely to shift while the robot is docking. So, avoid squeezing the base between furniture simply because the space looks tidy. A robot needs room to approach it properly.
Try to choose a permanent location now.
Remember, moving the dock after you have created a good map can cause navigation trouble on some models. Once the robot knows where home is, leaving home in the same place keeps things simpler.
Step 3: Charge the Robot Vacuum
You can plug in the dock and place the robot onto its charging contacts. Here, you should normally see a light, hear a sound, or get some other sign that charging has started. No response usually means the robot is not sitting correctly on the contacts. Lift it slightly and dock it again.
Give the battery a proper charge before the first full mapping or cleaning run. A half-charged robot may still work, but there is little reason to risk it running out of power halfway through its first trip around your home.
Okay, now you can download the app while the battery is filling.
Step 4: Download the Robotic Vacuum App
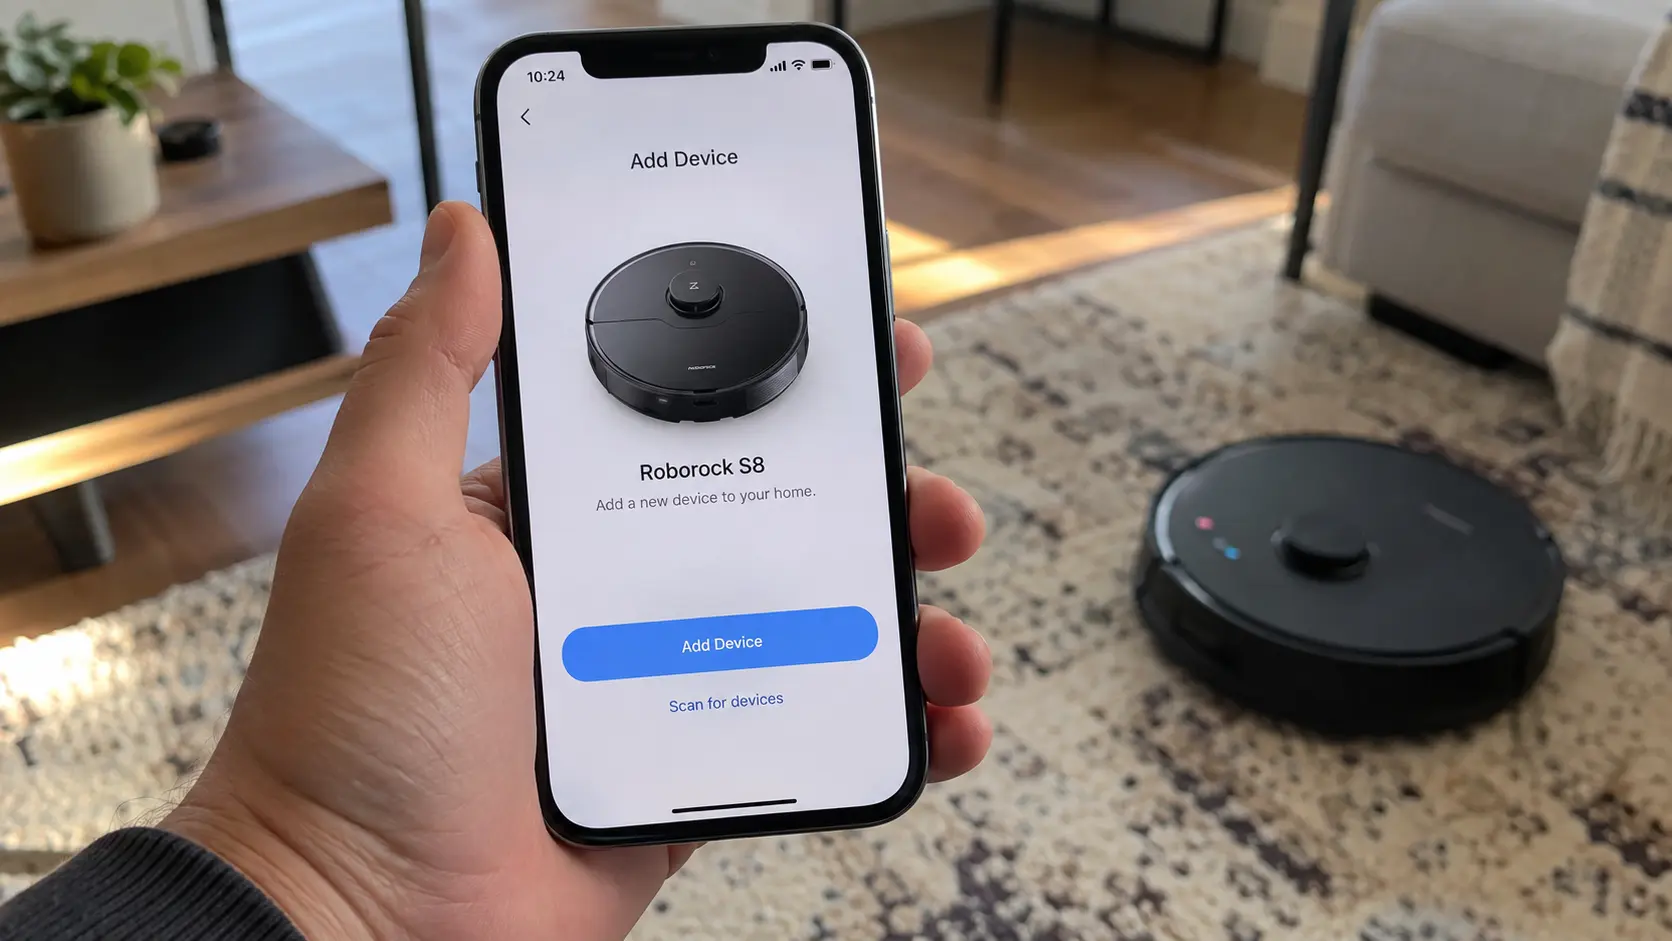
Search your phone’s app store for the app made by the robot’s manufacturer. Also, using the QR code in the manual is even easier because it reduces the chance of installing an unrelated app with a similar name.
The basic setup usually looks something like this:
- Install the official app.
- Create an account or sign in.
- Select Add Device or a similar option.
- Pick your exact robot vacuum model.
- Allow the permissions needed for setup.
Bluetooth, local network, and sometimes location permissions may appear during pairing. You can read each request rather than automatically accepting everything so you know what the app needs. Don’t give unnecessary permissions, okay.
Keep the robot nearby while doing this.
Step 5: Connect the Robotic Vacuum Cleaner to Wi-Fi
Now connect the robot to your home network. The app normally walks you through the process. You need to choose your Wi-Fi network, enter the password, and put the robot into pairing mode. Stay reasonably close to both the robot and router while doing it.
Actually, one detail causes a surprising amount of trouble: Wi-Fi bands.
A lot of robot vacuums support 2.4 GHz Wi-Fi. Some newer models also work with 5 GHz networks. So, you must check your model rather than assuming either one will work.
Pairing failed?
Try these before doing anything drastic:
- Check the Wi-Fi password again.
- Move the robot and phone closer to the router.
- Restart the app.
- Restart the robot.
- Temporarily turn off a VPN on your phone.
- Try the 2.4 GHz network if your model requires it.
- Check that Bluetooth is enabled when the app uses it during setup.
How to Map Your Home With a Robot Vacuum
Step 1: Prepare the House for Mapping
Do one quick walk around before starting. You should open the doors to rooms you want mapped. Get shoes, bags, laundry, cables, and temporary clutter off the floor. You must keep furniture in its normal position. You also want the charging dock to be in its permanent spot before mapping begins.
Then leave the robot alone as much as possible.
Step 2: Start the First Mapping Run
Robot vacuums generally create their maps in one of two ways.
| Mapping method | What happens | What to expect |
|---|---|---|
| Dedicated mapping run | The robot explores without doing a normal cleaning job. | Usually quicker because it can focus on learning the layout. |
| Mapping while cleaning | The robot builds the map while vacuuming. | Usually takes longer, but cleaning gets done at the same time. |
Your app will tell you which method is available. A dedicated mapping run is usually the easier option when your robot supports one. There is less for the machine to do, and you can deal with cleaning settings after the map is finished.
Quick Tip: Once it starts, don’t pick up the robot just because it takes a route that looks strange.
Robots often explore edges, doorways, and room boundaries in an order that makes little sense to you but works for their navigation system.
So, let it finish…
A real blockage is different. Rescue the robot when it gets physically stuck, then follow the app or manual instructions for continuing or restarting the map.
Step 3: Check and Edit the Finished Map
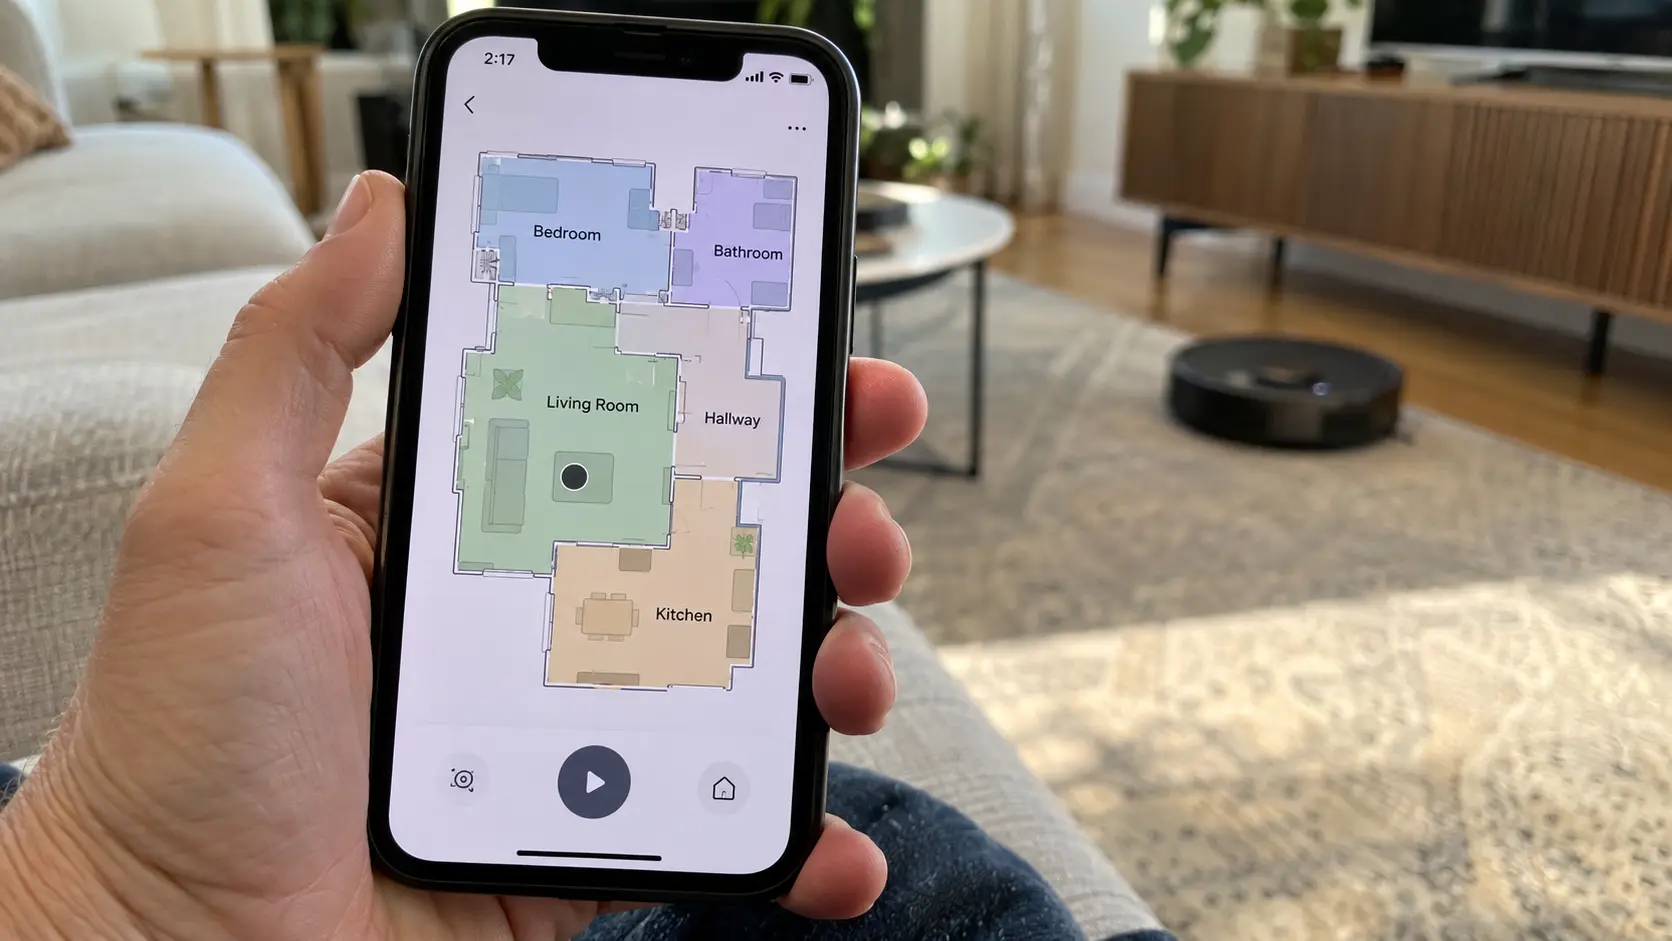
You can open the finished map in the app and look at it properly. Check that all major rooms are present and the general shape of the house makes sense.
Depending on your model, you may be able to:
- Name rooms
- Split one large room into two
- Merge areas the robot separated
- Adjust room boundaries
- Rename sections
- Save multiple floor maps
You can use simple names such as Kitchen, Living Room, Bedroom, and Hallway. Those labels become especially useful later for schedules and voice commands.
A slightly imperfect wall line is not usually a problem. A map with missing rooms, overlapping spaces, or badly distorted areas is different. I would suggest: remapping now is easier than fighting with a bad map every day. You can also check out my guide on the best LiDAR mapping robot vacuums.
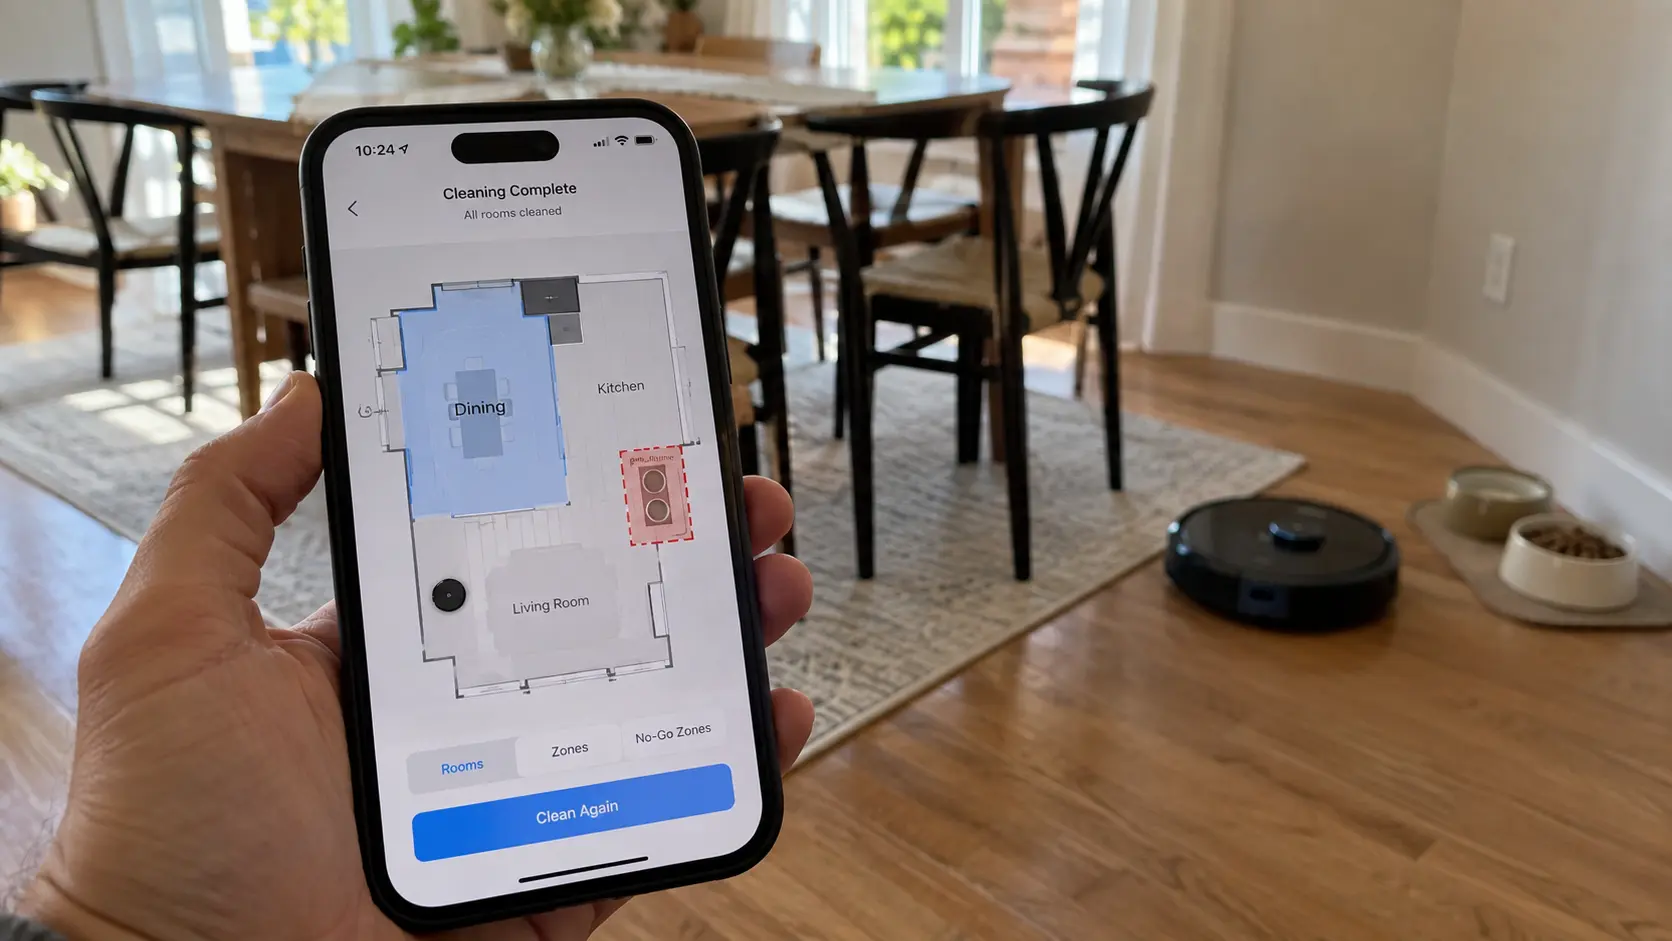
Set Up No-Go Zones, No-Mop Zones, and Cleaning Zones
Okay, once the map looks right, you can start adding boundaries. These tools solve several everyday robot vacuum problems without needing physical barriers around your home.
| Zone type | What it does | Useful for |
|---|---|---|
| No-go zone | Stops the robot from entering an area. | Cables, pet bowls, fragile objects, play areas |
| No-mop zone | Keeps the mopping system away from an area. | Rugs and carpets (check best robot vacuums for carpet) |
| Cleaning zone | Sends the robot to one selected part of a room. | Dining tables, kitchen work areas, entryways |
How to Use a Robot Vacuum for Everyday Cleaning
The hard part is finished. You now have a charged robot, working app, Wi-Fi connection, and usable map. Basically, everyday cleaning mostly comes down to choosing where you want it to clean and how much power it should use.
Step 1: Pick a Cleaning Mode
Names vary between brands, but most robot vacuum cleaners offer some version of these modes:
- Whole-home cleaning: Cleans the full mapped area.
- Room cleaning: Cleans only the rooms you select.
- Zone cleaning: Targets a smaller section of the map.
- Spot cleaning: Handles a small dirty area close to the robot.
- Vacuum only: Runs the suction and brushes without mopping.
- Vacuum and mop: Handles both jobs in one session.
- Mop only: Uses the mopping system without a normal vacuuming pass.
You do not need the fanciest mode for normal daily dust. Generally, whole-home or selected-room cleaning will handle most jobs.
Step 2: Use the Right Suction Level
You see, running at maximum suction power all the time usually makes little sense. Hard floors with a light layer of dust rarely need the same suction as a carpet covered in pet hair. (check: best robot vacuums for pet hair)
| Suction level | Best use | Main drawback |
|---|---|---|
| Low/Quiet | Light dust and quieter daytime cleaning | May leave larger debris |
| Standard | Normal everyday cleaning | Good balance for most homes |
| High/Max | Carpets, pet hair, heavier dirt | More noise and faster battery drain |
Move up only where you see a real benefit. Large homes may need a recharge during stronger cleaning jobs. Many modern robots can return to the dock, charge, and continue, but check that your model supports resume cleaning before relying on it.
Step 3: Clean Specific Rooms Instead of the Whole House
A robot does not need to tour every room each time somebody drops crumbs in the kitchen. Actually, targeted room cleaning is often much more useful.
So, send it to:
- The kitchen after cooking
- The dining area after meals
- The entryway after a rainy day
- The living room after guests leave
- A bedroom that needs cleaning without disturbing the rest of the house
How to Set a Robotic Vacuum Cleaning Schedule
Scheduling is one of the main reasons to own a robot vacuum. You can easily choose the days, time, rooms, and cleaning settings once. The robot then handles those jobs on its own. Most apps follow a similar process:
- Open the scheduling section.
- Select the days.
- Choose a start time.
- Select the full home or individual rooms.
- Choose suction or mopping settings.
- Save the schedule.
- Test the first scheduled run.
You may discover that the robot starts while somebody is still sleeping, reaches a room at an awkward time, or does not have enough battery to finish the job you created.
A practical schedule might look like:
- Monday, Wednesday, Friday: Main rooms
- Daily: Kitchen and dining area
- Weekend: Carpets at a higher suction level
You do not need to copy someone else’s schedule exactly. A home with pets may need daily cleaning. A quiet two-person home with mostly hard floors may need far less. Try to run the robot while your floor is normally clear. Scheduling it at 9 a.m. will not help much if toys, charging cables, and yesterday’s clothes are still lying everywhere.
How to Use the Mopping Feature Correctly
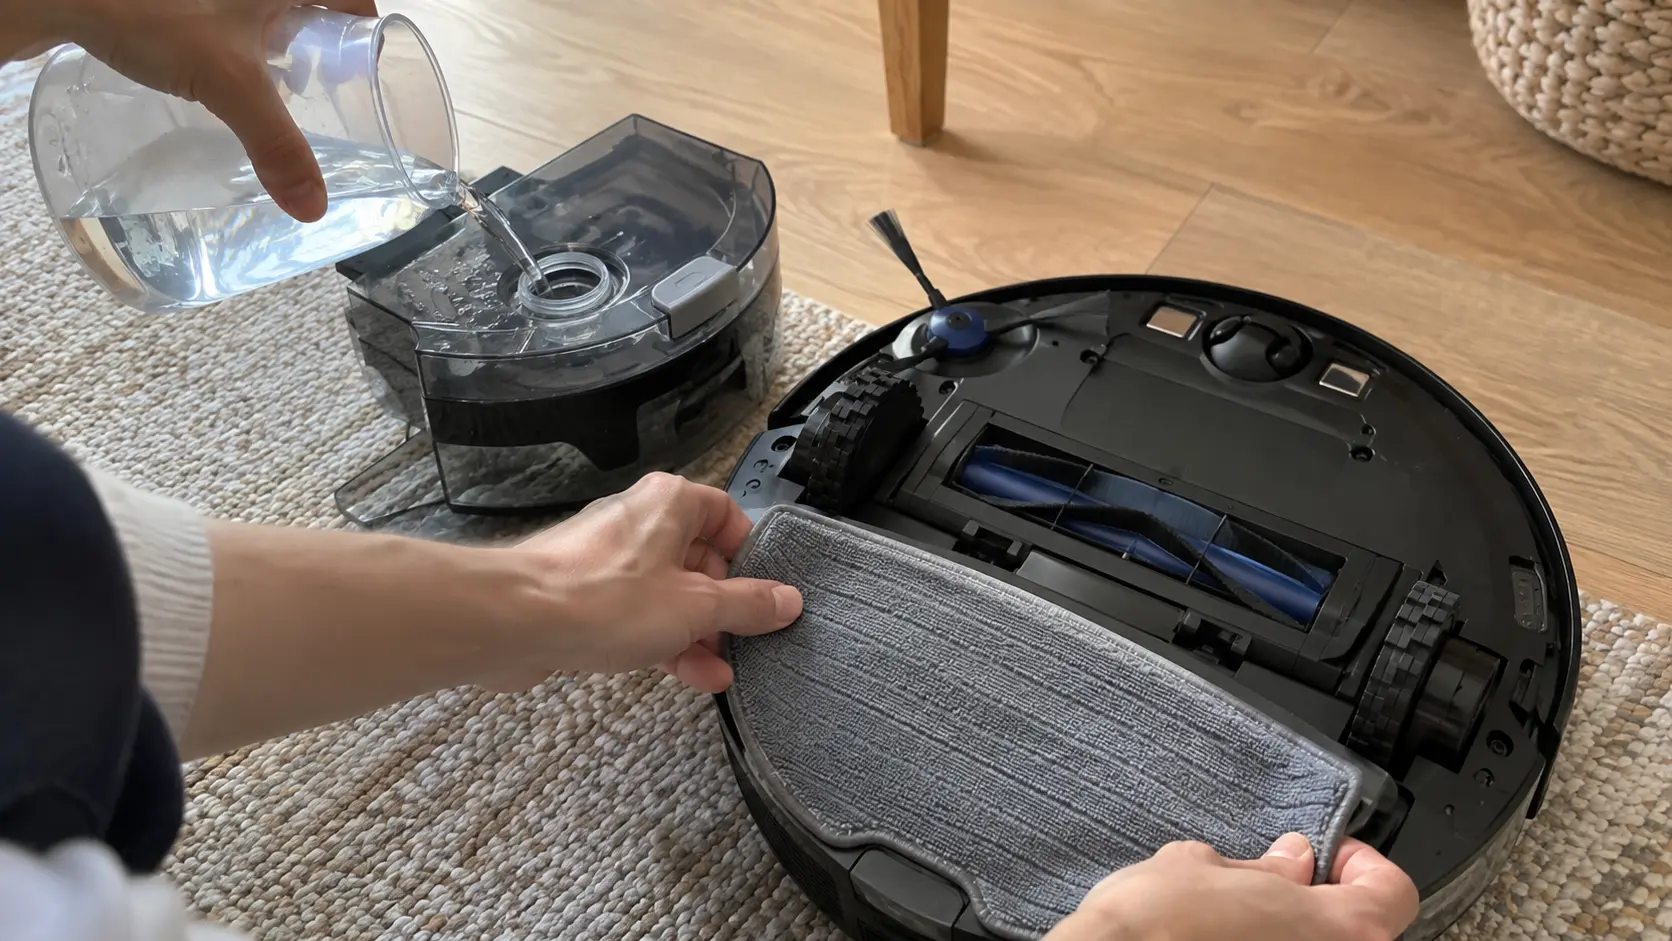
Robot vacuum mopping is easy to use, but it adds a few things you need to watch. You can start with the instructions for your particular mopping system.
- Fit the mop pad or mopping plate.
- Fill the clean-water tank where required.
- Choose the water level or mopping intensity.
- Check your no-mop zones.
- Start a vacuum-and-mop or mop-only job.
- Clean the pads after the run.
- Empty dirty water where your dock or robot collects it.
Warning: Never put floor cleaner into the robot’s water tank unless the manufacturer specifically approves it for that model. Using whatever cleaner you already have under the sink can cause foam, residue, clogged parts, or pump problems. Water alone is safer unless your manual says otherwise.
7 Robot Vacuum Setup Mistakes to Avoid
Here are some very common mistakes people make when setting up a new robot vacuum, and what you should do instead:
- Leaving tiny items on the floor: Robot vacuums love to eat phone cables, socks, and small toys, which gets them stuck fast. You must pick up all small clutter from the floor before you let the robot start cleaning.
- Placing the charging dock in a tight corner: If the dock is hidden behind heavy furniture or a narrow hallway, the robot often gets lost and cannot find its way home to charge. You need to put the dock in an open spot with plenty of clear space on both sides.
- Forgetting to set up no-go zones: Without virtual walls or boundaries, your vacuum will happily drive right onto thick bathroom rugs or get trapped under low chairs. Take five minutes in the app to mark off those tricky spots.
- Skipping the first full manual map run: Many people interrupt the initial mapping run or move the robot by hand while it is learning the house. Let it finish exploring your rooms completely on its own so the map stays accurate.
- Ignoring regular brush and filter cleaning: People think the machine is 100 percent smart and never needs help, but hair wraps around the rolling brush very fast. So, go ahead and pull out tangled hair and wash the filters every week so it keeps sucking strong.
- Leaving low-hanging curtains or long wires: Floor-length drapes look like solid walls to a robot sensor, so it tries to push through them and gets wrapped up. You can tie up loose cords and pin up long curtains so the robot can move freely.
- Using the wrong cleaning liquid in the tank: If you have a mopping robot, pouring regular floor soap into the water tank can ruin the pumps or leave sticky foam everywhere. Always use plain water or the exact special cleaner made for that brand.
Robot Vacuum Not Working After Setup? Quick Fixes
| Problem | Check first | What to try |
|---|---|---|
| Won’t connect to Wi-Fi | Network band and password | Move closer to the router, confirm compatibility, and pair again |
| Won’t charge | Dock power and charging contacts | Try another outlet and wipe the contacts with a dry cloth |
| Can’t find the dock | Dock position | Clear the path and make sure the base has not moved |
| Map looks wrong | Closed doors and clutter | Clear the floor and create a fresh map |
| Room is missing | Door access | Open the room and update or redo the map |
| Keeps getting stuck | Cables, rugs, thresholds | Remove the obstacle or create a no-go zone |
| Cleaning is weak | Bin, filter, brush, suction | Empty the bin, remove tangled hair, and try stronger suction |
FAQs
Do you need Wi-Fi to use a robot vacuum?
Not always. Some robot vacuums can start a basic cleaning cycle from a button on the machine. Actually, Wi-Fi becomes much more important once you want app controls, saved maps, room cleaning, schedules, zones, notifications, and remote access.
Should you charge a robot vacuum before first use?
Yes. Starting with a full battery gives the robot a better chance of completing its first mapping or cleaning run without stopping halfway. This is not mandatory, but still preferable for large homes.
How long does it take a robot vacuum to map a house?
There is no single time that fits every home, but it is usually between 10-30 minutes or sometimes longer. Floor area, room count, furniture, navigation technology, and mapping method all affect the job. A small apartment will naturally take less time than a large multi-room home. Plus, dedicated mapping can also be faster than creating a map while vacuuming.
Can you move a robot vacuum to another floor?
Yes. You can easily carry it upstairs or downstairs yourself. Robots with multi-floor mapping can usually save separate floor plans. But some budget robot vacuum cleaner models without that feature may require more manual work or a new map.
Should you leave a robot vacuum on its charging dock?
For normal everyday use, yes. The dock keeps the battery charged and gives the robot a reliable place to return after cleaning. You can also check out my guide on how long vacuums last.